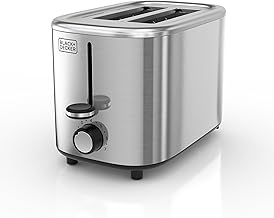
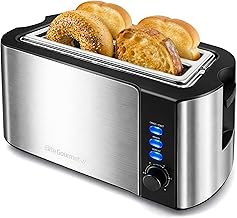
A grilled cheese toaster is a convenient kitchen appliance designed to make perfectly toasted sandwiches with minimal effort. To use one, start by preheating the toaster according to the manufacturer's instructions. While it's heating up, prepare your sandwich by placing cheese and any additional fillings between two slices of bread. Once the toaster is ready, carefully place the sandwich inside, ensuring it's centered and the bread is flat against the heating plates. Close the toaster and let it do its magic. The built-in timer will alert you when your sandwich is done, typically in 2-4 minutes. Open the toaster, remove your sandwich, and enjoy! Remember to always follow safety precautions when using any kitchen appliance, and keep an eye on the sandwich to prevent overcooking or burning.
| Characteristics | Values |
|---|---|
| Product Name | Grilled Cheese Toaster |
| Function | Toasts and grills cheese sandwiches |
| Material | Stainless steel body with non-stick heating plates |
| Size | Compact, suitable for small kitchens |
| Power Source | Electric, 120V AC |
| Wattage | 600 watts |
| Temperature Control | Adjustable temperature settings |
| Cooking Time | Approximately 2-4 minutes per sandwich |
| Capacity | Can accommodate up to 2 sandwiches at a time |
| Safety Features | Automatic shut-off, cool-touch handles |
| Ease of Use | Simple operation with on/off switch |
| Cleaning | Removable and dishwasher-safe drip tray |
| Cord Length | 3 feet |
| Weight | Approximately 5 pounds |
| Dimensions | 10 inches x 8 inches x 6 inches |
| Warranty | 1-year limited warranty |
| Additional Features | Indicator lights for power and preheat |
Explore related products


What You'll Learn
- Preparation: Gather ingredients, preheat toaster, and prepare bread and cheese for toasting
- Assembly: Layer cheese between bread slices, ensuring even distribution for optimal melting
- Toasting: Place sandwich in toaster, adjust settings, and monitor for desired crispiness and cheese melt
- Safety: Use oven mitts to handle hot toaster and sandwich, avoid burns
- Cleaning: Unplug toaster, remove crumbs, and wipe down surfaces after use to maintain hygiene
![]()
Preparation: Gather ingredients, preheat toaster, and prepare bread and cheese for toasting
Before you begin the process of making a grilled cheese sandwich in a toaster, it's essential to gather all the necessary ingredients and tools. This includes two slices of bread, preferably a type that toasts well such as sourdough or white bread, and a good quality cheese that melts nicely, like cheddar or mozzarella. You'll also need a toaster that can accommodate the thickness of your bread slices and has a temperature control setting.
Once you have your ingredients and tools ready, the next step is to preheat your toaster. This is crucial as it ensures that the bread will toast evenly and the cheese will melt properly. Most toasters have a temperature control setting, so make sure to set it to the appropriate level for your type of bread and cheese. If your toaster doesn't have a temperature control, you may need to experiment with different toasting times to achieve the desired result.
While the toaster is preheating, prepare your bread and cheese for toasting. This involves lightly spreading butter on one side of each slice of bread. This will help the bread to toast more evenly and will also add a delicious flavor to your sandwich. Next, place a slice of cheese on the non-buttered side of one slice of bread. Make sure the cheese is evenly distributed and doesn't extend beyond the edges of the bread.
Now that your toaster is preheated and your bread and cheese are prepared, you're ready to start toasting. Carefully place the slice of bread with the cheese on it into the toaster, making sure that the buttered side is facing outwards. Then, place the second slice of bread, buttered side up, on top of the first slice. Close the toaster and let it do its magic.
The toasting process should take a few minutes, depending on the temperature of your toaster and the thickness of your bread. Keep an eye on it to ensure that it doesn't overcook. Once the bread is golden brown and the cheese is melted, carefully remove the sandwich from the toaster using a spatula or tongs. Allow it to cool for a minute or two before cutting it in half and serving.
The Perfect Warm-Up: Grilled Cheese Edition
You may want to see also
Explore related products


![]()
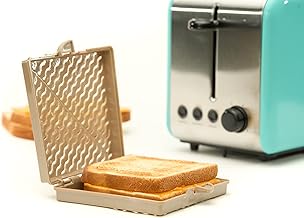
Assembly: Layer cheese between bread slices, ensuring even distribution for optimal melting
To achieve the perfect grilled cheese sandwich, the assembly process is crucial. Start by selecting your bread and cheese. Opt for bread that is sturdy enough to hold up to grilling, such as sourdough or whole wheat. For cheese, choose a variety that melts well, like cheddar, mozzarella, or a blend.
Next, preheat your grilled cheese toaster to the appropriate temperature. Most toasters have a temperature control setting, so adjust it to medium-high heat. While the toaster is heating up, prepare your bread and cheese.
Lay out two slices of bread on a clean surface. On one slice, begin layering your cheese. It's important to distribute the cheese evenly across the bread to ensure optimal melting. You can use a single type of cheese or mix different varieties for a more complex flavor profile.
Once you've layered your cheese, place the second slice of bread on top. Gently press down on the sandwich to ensure the cheese is evenly distributed and the bread slices are firmly together.
Now, carefully place the sandwich in the preheated toaster. Close the lid and let the magic happen. The toaster will grill the sandwich, melting the cheese and toasting the bread to perfection.
Keep an eye on the sandwich as it cooks. Depending on your toaster and the thickness of your bread, it may take anywhere from 3 to 5 minutes for the sandwich to reach your desired level of crispiness. Once the sandwich is done, carefully remove it from the toaster and let it cool for a moment before slicing and serving.
Mastering the Art of Smoking Cheese on a Pit Boss Pellet Grill
You may want to see also
Explore related products


![]()
Toasting: Place sandwich in toaster, adjust settings, and monitor for desired crispiness and cheese melt
Begin by ensuring your toaster is clean and free of any debris from previous uses. This will prevent any unwanted flavors or potential fire hazards. Next, select your desired bread type and cheese. For a classic grilled cheese, white bread and cheddar cheese are popular choices. However, feel free to experiment with whole grain bread or a blend of cheeses like mozzarella and provolone for a unique twist.
Once you've prepared your sandwich, place it in the toaster. Most toasters have a lever on the side that you'll need to press down to lower the bread into the heating elements. Before you do this, adjust the toaster's settings to your preferred level of crispiness. If you're unsure, start with a medium setting and adjust as needed for future toasts.
Keep a close eye on the sandwich as it toasts. The cheese should begin to melt and ooze out slightly, while the bread turns a golden brown. If you notice the bread browning too quickly, reduce the heat setting. Conversely, if the cheese isn't melting to your liking, increase the heat or toast for a longer duration.
When the sandwich has reached your desired level of crispiness and the cheese is fully melted, carefully remove it from the toaster using a pair of tongs or a spatula. Be cautious, as the toaster and the sandwich will be hot. Allow the sandwich to cool for a moment before cutting it in half and serving.
Remember, practice makes perfect. Experiment with different bread types, cheeses, and toaster settings to find your ideal grilled cheese combination. With time, you'll become a grilled cheese toaster master, able to create the perfect sandwich every time.
Elevate Your Grilled Ham and Cheese: A Flavor Revolution
You may want to see also
Explore related products


$10.99 $10.99


![]()
Safety: Use oven mitts to handle hot toaster and sandwich, avoid burns
Handling a hot grilled cheese toaster and its freshly made sandwich requires caution to prevent burns. Oven mitts are an essential safety tool in this scenario. They provide a thick, heat-resistant barrier between your hands and the hot surfaces. When using a grilled cheese toaster, it's crucial to grasp the handles firmly with oven mitts to avoid direct contact with the heated metal. Similarly, when retrieving the sandwich, use the mitts to protect your hands from the radiant heat.
Beyond the immediate risk of burns, there are other safety considerations. Ensure the toaster is placed on a stable, heat-resistant surface to prevent it from tipping over. Keep the area around the toaster clear of flammable materials such as paper towels or dishcloths. It's also important to supervise children when using the toaster to ensure they understand the risks and use it correctly.
In terms of maintenance, regularly clean the toaster to prevent the buildup of grease and food particles, which can be a fire hazard. Unplug the toaster when not in use and allow it to cool down completely before storing it. By following these safety guidelines, you can enjoy delicious grilled cheese sandwiches while minimizing the risk of accidents in the kitchen.
Savor the Simplicity: The Art of Perfect Grilled Cheese
You may want to see also
Explore related products


![]()
Cleaning: Unplug toaster, remove crumbs, and wipe down surfaces after use to maintain hygiene
To ensure the longevity and optimal performance of your grilled cheese toaster, regular cleaning is essential. After each use, it's crucial to unplug the toaster to prevent any electrical hazards while cleaning. Begin by removing any crumbs or debris from the toaster's crumb tray or bottom surface. This will help prevent any buildup that could lead to unpleasant odors or even fires.
Next, use a soft, damp cloth to wipe down the exterior surfaces of the toaster, including the sides, top, and handle. Be sure to avoid using abrasive cleaners or scrubbers, as these can damage the toaster's finish. For tougher stains or grease buildup, you can use a mild dish soap solution, but be sure to rinse thoroughly and dry with a clean cloth.
It's also important to clean the toaster's heating elements, as these can accumulate food particles and grease over time. To do this, use a soft brush or toothbrush to gently remove any debris from the heating elements. Be sure to avoid using water or any liquid cleaners on the heating elements, as this can cause electrical shorts or other hazards.
In addition to regular cleaning, it's a good idea to deep clean your toaster every few months. This involves disassembling the toaster and cleaning each component individually. Refer to your toaster's user manual for specific instructions on how to do this safely and effectively.
By following these cleaning guidelines, you can help ensure that your grilled cheese toaster remains in good working condition and continues to produce delicious, perfectly toasted sandwiches for years to come.
Elevate Your Grilled Cheese: Creative Ways to Add Flavor and Fun
You may want to see also