Warming up a Starbucks grilled cheese sandwich at home can be a delightful way to enjoy a comforting meal. To achieve the perfect balance of melted cheese and crispy bread, it's essential to use the right techniques. In this guide, we'll walk you through the steps to reheat your Starbucks grilled cheese sandwich, ensuring it retains its delicious flavor and texture. Whether you prefer using an oven, stovetop, or microwave, we've got you covered with easy-to-follow instructions. Get ready to indulge in a warm, satisfying grilled cheese sandwich that tastes just like it did when you first bought it.
Explore related products


What You'll Learn
- Preheat your oven: Set it to 350°F (175°C) for even heating
- Unwrap the sandwich: Remove any plastic or paper wrapping
- Place on baking sheet: Use a sheet with parchment paper to prevent sticking
- Heat for 5-7 minutes: Monitor to ensure even warming and no burning
- Check for doneness: Look for melted cheese and a crispy exterior
![]()
Preheat your oven: Set it to 350°F (175°C) for even heating
To achieve the perfect warm-up for your Starbucks grilled cheese at home, preheating your oven to 350°F (175°C) is crucial. This temperature setting ensures even heating, which is essential for maintaining the integrity of the sandwich's texture and flavor. When your oven reaches this temperature, it creates a consistent environment that gently warms the sandwich without burning or drying it out.
One common mistake is not allowing the oven to fully preheat before placing the sandwich inside. This can result in uneven warming, where the outside of the sandwich becomes too hot while the inside remains cold. To avoid this, make sure to give your oven ample time to reach the desired temperature. Typically, this takes about 10-15 minutes, depending on your oven's efficiency.
Another important aspect to consider is the placement of the sandwich in the oven. For optimal results, position the sandwich in the center of the oven rack. This allows for uniform heat distribution around the sandwich, ensuring that it warms up evenly on all sides. Avoid placing the sandwich too close to the heating elements, as this can cause the bread to become too crispy or even burnt.
When warming up multiple sandwiches, make sure to space them out evenly on the oven rack. Overcrowding the rack can lead to uneven heating, as the sandwiches may block the heat from reaching each other properly. If necessary, warm the sandwiches in batches to ensure that each one receives the appropriate amount of heat.
Finally, keep an eye on the sandwich while it's warming up. The ideal warming time will depend on the thickness of the sandwich and your personal preference for temperature. As a general guideline, start checking the sandwich after 5 minutes and continue to monitor it until it reaches your desired level of warmth. Remember, the goal is to achieve a perfectly warmed sandwich that's as close to the original Starbucks experience as possible.
Delicious DIY: Creating the Perfect Grilled Cheese Bar at Home
You may want to see also
Explore related products


![]()
Unwrap the sandwich: Remove any plastic or paper wrapping
Begin by carefully examining the sandwich to identify any plastic or paper wrapping. Starbucks typically uses a combination of both materials to ensure the sandwich stays fresh and protected during transport. The plastic wrap is usually clear, making it easy to spot, while the paper wrapping may have the Starbucks logo or other branding elements.
To remove the plastic wrap, gently grasp one edge of the wrap and slowly peel it away from the sandwich. Be careful not to tear the wrap, as this could result in small pieces of plastic sticking to the sandwich. If the plastic wrap is particularly stubborn, you can use a small knife or scissors to carefully cut along the edge, but be cautious not to damage the sandwich itself.
Next, move on to the paper wrapping. This is usually easier to remove, as it is less likely to stick to the sandwich. Simply grasp the paper at one corner and peel it away, taking care to remove any tape or adhesive strips that may be holding the paper in place.
Once the sandwich is unwrapped, inspect it for any signs of damage or contamination. If everything looks good, you can proceed to the next step of warming up the sandwich. Remember to dispose of the plastic and paper wrapping responsibly, recycling them if possible.
In summary, unwrapping the sandwich involves carefully removing both the plastic and paper wrapping, inspecting the sandwich for any damage, and then proceeding to the next step of warming it up. By following these steps, you can ensure that your Starbucks grilled cheese sandwich is ready to be enjoyed at home.
Mastering the Art of Smoking Cheese on a Rec Tec Grill
You may want to see also
Explore related products


![]()
Place on baking sheet: Use a sheet with parchment paper to prevent sticking
To effectively warm up a Starbucks grilled cheese sandwich at home, it's crucial to use the right tools and techniques. One key step is to place the sandwich on a baking sheet lined with parchment paper. This method not only prevents the sandwich from sticking to the sheet but also ensures even heating. Preheat your oven to 350°F (175°C) before placing the sandwich on the prepared baking sheet.
The parchment paper acts as a non-stick surface, making it easier to remove the sandwich once it's warmed to your liking. Additionally, using a baking sheet allows for better heat distribution compared to a skillet or microwave, resulting in a more evenly toasted sandwich. Be sure to monitor the sandwich closely to avoid overcooking, as oven temperatures can vary.
For optimal results, you can also lightly brush the top of the sandwich with melted butter before placing it in the oven. This will help achieve a golden-brown, crispy exterior similar to the original Starbucks grilled cheese. Remember to use oven mitts when handling the hot baking sheet to prevent burns.
In summary, using a baking sheet with parchment paper is a simple yet effective method for warming up a Starbucks grilled cheese sandwich at home. It ensures even heating, prevents sticking, and can help achieve a crispy exterior when combined with a light brushing of melted butter.
Mastering the Art of Smoking Cheese on a Louisiana Pellet Grill
You may want to see also
Explore related products


![]()
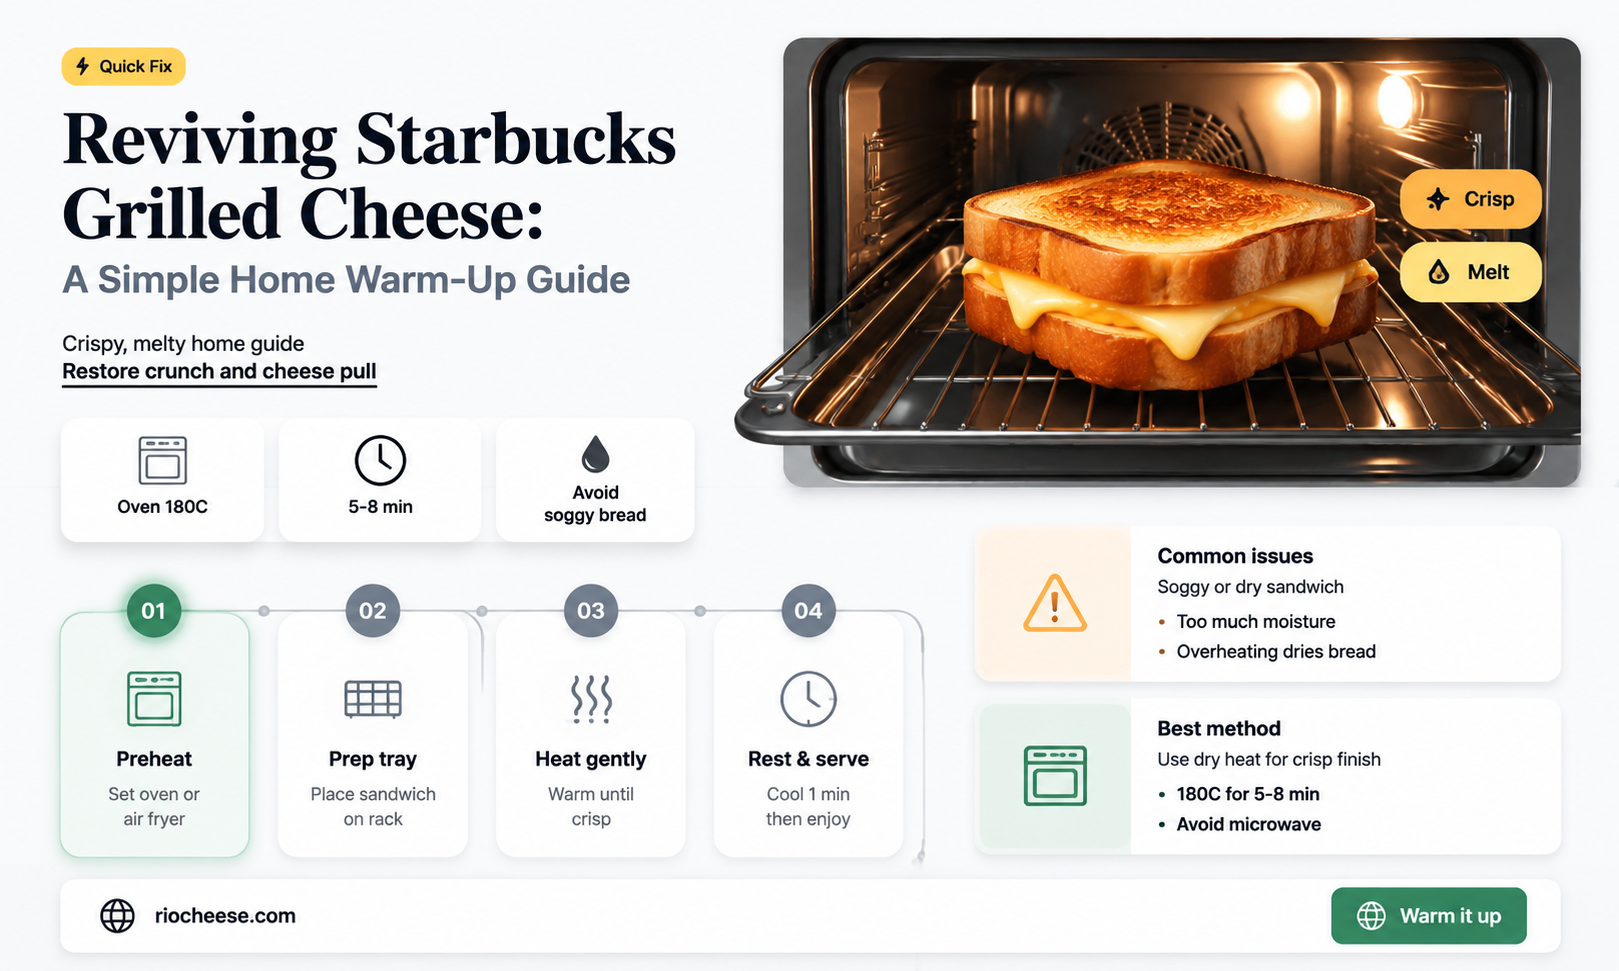
Heat for 5-7 minutes: Monitor to ensure even warming and no burning
To achieve the perfect warm-up for your Starbucks grilled cheese at home, it's crucial to master the art of heating it evenly without burning. Start by preheating your oven to 350°F (175°C). While the oven is heating up, remove your grilled cheese from its packaging and place it on a baking sheet lined with parchment paper. This will help prevent sticking and make cleanup easier.
Once the oven has reached the desired temperature, carefully place the baking sheet with the grilled cheese inside. Set a timer for 5-7 minutes, keeping a close eye on the sandwich to ensure it doesn't overcook. The key here is to monitor the grilled cheese closely, as ovens can have hot spots that may cause uneven warming or even burning.
To check for even warming, you can gently press on the top of the grilled cheese with your fingers or a spatula. If it feels warm and the cheese inside is starting to melt, it's ready. If not, continue to heat it in 1-minute increments until it reaches the desired temperature. Be cautious not to leave the grilled cheese unattended, as it can quickly go from perfectly warmed to burnt if left in the oven for too long.
Another method to ensure even warming is to use a toaster oven or an air fryer. These appliances tend to heat food more evenly and can be a great alternative to a traditional oven. Simply follow the manufacturer's instructions for heating a sandwich, and keep a close eye on the grilled cheese to prevent burning.
Remember, the goal is to achieve a warm, gooey grilled cheese without any burnt or crispy edges. By monitoring the heating process closely and adjusting the time and temperature as needed, you can enjoy a perfectly warmed Starbucks grilled cheese at home.
Elevate Your Grilled Cheese: Creative Ways to Add Flavor and Fun
You may want to see also
Explore related products


![]()
Check for doneness: Look for melted cheese and a crispy exterior
To ensure your Starbucks grilled cheese is warmed to perfection, pay close attention to the visual cues of doneness. The cheese should be fully melted, creating a gooey and stretchy texture that's visible through the slightly parted bread slices. This melting process typically occurs when the sandwich is heated evenly, allowing the cheese to reach a consistent temperature throughout.
The exterior of the sandwich is equally important. A properly warmed Starbucks grilled cheese should have a crispy, golden-brown crust. This crispiness is achieved through a combination of heat and pressure, which caramelizes the bread's natural sugars and creates a satisfying crunch. The ideal scenario is when the cheese is melted just as the bread reaches this perfect level of crispiness, resulting in a harmonious balance of textures.
To check for doneness, gently press down on the sandwich with a spatula or your hand (being careful not to burn yourself). If the cheese is melted and the bread is crispy, the sandwich should yield slightly under pressure. You can also carefully pull apart the bread slices to peek inside; if the cheese is fully melted and stretchy, it's a good indication that the sandwich is ready.
Remember, the key to successfully warming a Starbucks grilled cheese at home is to replicate the conditions that created its original deliciousness. By focusing on the visual and textural cues of melted cheese and a crispy exterior, you'll be able to enjoy a sandwich that's just as satisfying as the one you bought from the store.
Mastering the Art of Smoking Cheese on a Charcoal Grill
You may want to see also
Frequently asked questions
To warm up a Starbucks grilled cheese sandwich at home without making it soggy, you can use a skillet or griddle over medium heat. Place the sandwich on the skillet and cover it with a lid or aluminum foil to trap the heat. This method will help melt the cheese and warm the bread evenly without adding moisture.
While a microwave can be used to reheat a Starbucks grilled cheese sandwich, it's not the best option as it can make the bread soggy. If you do choose to use a microwave, place the sandwich on a microwave-safe plate and cover it with a damp paper towel to help retain some crispiness.
To warm up a Starbucks grilled cheese sandwich in a skillet, you should cook it for about 2-3 minutes on each side over medium heat. Keep an eye on it to ensure the bread doesn't burn and the cheese melts evenly.
The ideal temperature to warm up a Starbucks grilled cheese sandwich in an oven is around 350°F (175°C). Place the sandwich on a baking sheet and cover it with aluminum foil. Bake for about 10-15 minutes or until the cheese is melted and the bread is warmed through.