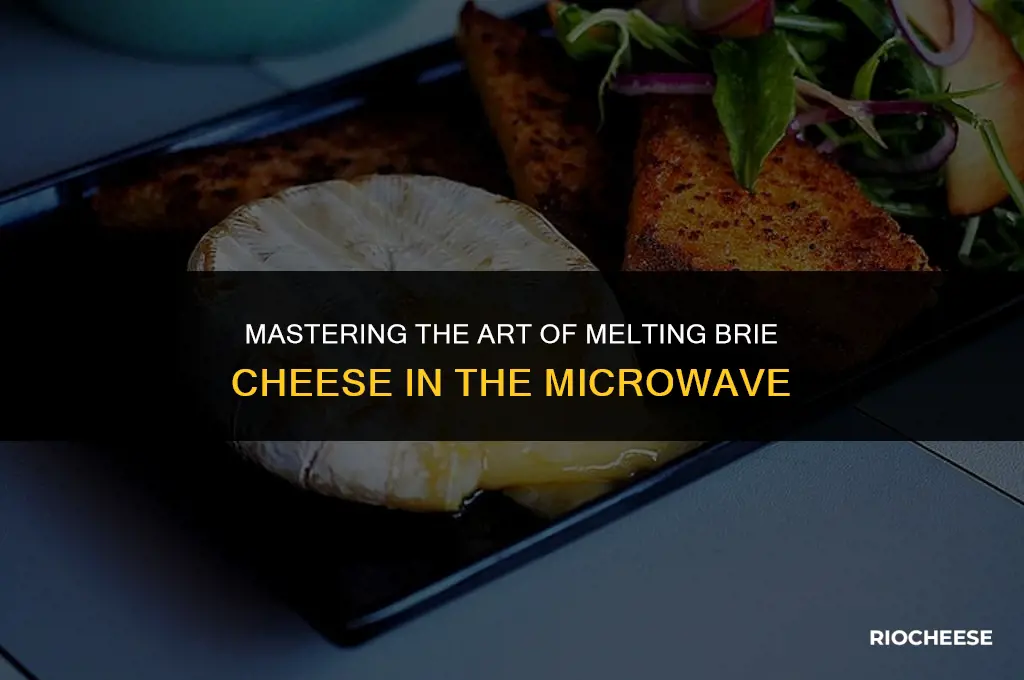
Melting brie cheese in the microwave is a quick and convenient method to achieve a creamy, gooey texture perfect for various culinary applications. Whether you're preparing a decadent grilled cheese sandwich, a savory baked potato topping, or a rich addition to your favorite pasta dish, microwaving brie cheese can yield excellent results. To ensure the best outcome, it's essential to follow specific steps and guidelines to prevent the cheese from becoming rubbery or losing its flavor. In this guide, we'll walk you through the process of melting brie cheese in the microwave, providing tips and tricks to achieve the perfect consistency and taste.
Explore related products

What You'll Learn
- Preparation: Ensure the brie is at room temperature. Remove any plastic wrap or packaging
- Cutting: Slice the brie into even pieces to promote uniform melting
- Microwave-safe dish: Place the brie slices in a microwave-safe dish
- Covering: Cover the dish with a microwave-safe lid or plastic wrap to trap moisture
- Melting: Microwave on high for 30-45 seconds, checking frequently to avoid overheating
![]()
Preparation: Ensure the brie is at room temperature. Remove any plastic wrap or packaging
To begin the process of melting brie cheese in the microwave, it is crucial to ensure that the cheese is at room temperature. This step is often overlooked but is essential for achieving the desired texture and consistency when melted. Cold cheese tends to melt unevenly and may become rubbery or stringy. By allowing the brie to come to room temperature, you promote a smoother, more uniform melting process.
Next, remove any plastic wrap or packaging from the brie. This is important for several reasons. Firstly, plastic can melt and release harmful chemicals when exposed to microwave radiation, which can contaminate the cheese and pose a health risk. Secondly, the plastic can create hotspots in the microwave, leading to uneven melting and potentially burning certain areas of the cheese. By removing the plastic, you ensure a safer and more effective melting process.
Now, consider the size and shape of the brie piece you intend to melt. Smaller pieces will melt more quickly and evenly than larger ones. If you are melting a whole wheel of brie, it may be necessary to cut it into smaller sections to promote even melting. Additionally, the shape of the cheese can affect how it melts. For example, a wedge of brie with the rind on one side may melt differently than a piece with the rind removed. Experiment with different sizes and shapes to find the best method for your specific needs.
Before placing the brie in the microwave, it is important to cover it with a microwave-safe lid or plastic wrap to prevent splattering and to retain moisture. This will help to create a more even melting process and will also make cleanup easier. Be sure to use a lid that fits snugly to prevent steam from escaping, which can cause the cheese to dry out.
Finally, consider the power level of your microwave. Most microwaves have adjustable power settings, and using a lower power level can help to prevent the cheese from overheating and becoming rubbery. Start with a lower power level and adjust as needed to achieve the desired melting consistency. Remember to monitor the cheese closely and to stir or rotate it periodically to promote even melting.
By following these steps and considering the specific characteristics of the brie cheese you are melting, you can achieve a smooth, creamy texture that is perfect for a variety of dishes. Whether you are using the melted brie as a dip, a sauce, or a topping, taking the time to properly prepare and melt the cheese will result in a more enjoyable and satisfying culinary experience.
The Melting Mystery: What Happens to Cheese Curds When Heated?
You may want to see also
![]()
Cutting: Slice the brie into even pieces to promote uniform melting
To ensure even melting of brie cheese in the microwave, it's crucial to cut it into uniform pieces. This step is often overlooked, but it plays a significant role in achieving a smooth, consistent texture. When brie is sliced into even pieces, each portion melts at the same rate, preventing some areas from becoming too soft or remaining too firm. This uniformity is key to a successful melting process.
Begin by selecting a sharp knife to make clean cuts through the cheese. A serrated knife works particularly well for this task. Place the brie on a cutting board and gently press down with the knife, using a rocking motion to slice through the cheese. Aim for pieces that are roughly the same size and shape. If the brie has a rind, you can either remove it before cutting or leave it on, depending on your preference.
For optimal melting, cut the brie into small, bite-sized pieces. This increases the surface area, allowing the cheese to melt more evenly and quickly. If you're melting a larger quantity of brie, consider arranging the pieces in a single layer on a microwave-safe plate. This will help ensure that each piece is exposed to the microwave's heat, promoting uniform melting.
Once the brie is cut, it's ready to be melted in the microwave. Place the cheese pieces in a microwave-safe dish and cover them loosely with a microwave-safe lid or plastic wrap. This helps to trap the heat and moisture, resulting in a smoother melt. Microwave the brie on high for about 30 seconds to 1 minute, checking frequently to avoid overheating. The cheese should be soft and easily spreadable when done.
Remember, the key to successfully melting brie in the microwave is to start with evenly cut pieces. This simple step makes a significant difference in the final texture and consistency of the melted cheese. By following these guidelines, you'll be able to achieve a perfectly melted brie every time.
Mastering the Art of Melting Chihuahua Cheese: A Delicious Guide
You may want to see also
![]()
Microwave-safe dish: Place the brie slices in a microwave-safe dish
When melting brie cheese in the microwave, the choice of dishware is crucial. A microwave-safe dish ensures that the container won't react with the microwave's heat, potentially causing sparks or even fires. Look for dishes labeled explicitly as microwave-safe, typically made from glass, ceramic, or certain types of plastic. Avoid using metal containers or those with metallic trims, as they can cause arcing. Once you've selected an appropriate dish, arrange the brie slices in a single layer to ensure even melting. If the brie has a rind, it's best to remove it before microwaving, as it can become tough and chewy when heated.
The key to successfully melting brie in the microwave lies in the timing and power level. Start by microwaving the brie on high for about 15-20 seconds. Check the cheese; if it's not fully melted, continue microwaving in 5-second intervals until it reaches the desired consistency. Be cautious, as brie can quickly go from perfectly melted to overheated and rubbery. If you're melting a larger quantity of brie, you may need to adjust the timing accordingly. Remember that microwaves vary in power, so it's essential to monitor the melting process closely to avoid overcooking.
One common mistake when melting brie in the microwave is not allowing it to rest after heating. Brie needs a moment to cool slightly and firm up, which helps it maintain its shape and texture when served. After microwaving, let the brie sit at room temperature for about 30 seconds to 1 minute before using it. This brief resting period ensures that the cheese is both safe to eat and at its best in terms of flavor and consistency.
For an extra touch of flavor, consider adding a pinch of salt or a drizzle of honey to the melted brie. These simple additions can enhance the cheese's natural taste and make it even more delicious. When serving, pair the melted brie with crackers, bread, or fresh fruit for a delightful appetizer or snack. By following these steps and tips, you'll be able to melt brie cheese in the microwave like a pro, creating a delicious and impressive dish with minimal effort.
The Art of Melting Laughing Cow Cheese: A Delicious Guide
You may want to see also
![]()
Covering: Cover the dish with a microwave-safe lid or plastic wrap to trap moisture
Covering the dish with a microwave-safe lid or plastic wrap is a crucial step in melting Brie cheese in the microwave. This method helps to trap moisture, ensuring that the cheese melts evenly and doesn't dry out. When covering the dish, make sure the lid or wrap is secure but not airtight, as this can cause steam to build up and potentially lead to an explosion. It's also important to use microwave-safe materials to avoid any harmful chemicals leaching into the cheese.
One common mistake people make when melting Brie in the microwave is not covering the dish properly. This can result in the cheese drying out and becoming tough and rubbery. To avoid this, make sure the lid or wrap is large enough to cover the entire dish and that it's placed securely on top. If using plastic wrap, you can poke a few small holes in it to allow steam to escape while still trapping most of the moisture.
Another benefit of covering the dish is that it helps to retain heat, which can speed up the melting process. This is especially useful if you're in a hurry or if your microwave isn't very powerful. However, it's important to note that covering the dish can also lead to overcooking if you're not careful. To avoid this, make sure to check the cheese frequently and remove it from the microwave as soon as it's melted to your desired consistency.
In terms of practical tips, using a glass or ceramic dish with a matching lid can make the process of melting Brie in the microwave much easier. These materials are microwave-safe and can help to distribute heat more evenly. Additionally, if you don't have a microwave-safe lid, you can use a piece of parchment paper or wax paper to cover the dish. Just make sure to secure it with a piece of microwave-safe tape or a rubber band to prevent it from coming off during cooking.
Overall, covering the dish with a microwave-safe lid or plastic wrap is an essential step in melting Brie cheese in the microwave. It helps to trap moisture, retain heat, and prevent the cheese from drying out. By following these tips and avoiding common mistakes, you can achieve perfectly melted Brie every time.
The Art of Melting Cheese Curds: A Gourmet's Guide
You may want to see also
![]()
Melting: Microwave on high for 30-45 seconds, checking frequently to avoid overheating
To melt brie cheese in a microwave, it's crucial to monitor the process closely to achieve the perfect consistency without overheating. Start by placing the brie cheese in a microwave-safe dish. Cover the dish loosely with a microwave-safe lid or plastic wrap, leaving a small vent for steam to escape. This helps to trap the heat and moisture, ensuring even melting.
Set your microwave to high power and heat the cheese for 30-45 seconds. The exact time will depend on the wattage of your microwave and the amount of cheese you're melting. It's essential to check the cheese frequently during this process. Brie cheese can go from perfectly melted to overheated and rubbery in a matter of seconds.
When checking the cheese, carefully remove the dish from the microwave using oven mitts or a towel, as it will be hot. Gently stir the cheese with a spoon or spatula to distribute the heat evenly. If the cheese isn't fully melted, return it to the microwave for another 10-15 seconds and check again.
Remember, the goal is to achieve a smooth, creamy texture. Overheating can cause the cheese to become tough and lose its delicate flavor. Once the brie is melted to your liking, remove it from the microwave and let it sit for a minute or two before using. This allows the cheese to cool slightly and thicken, making it easier to handle and incorporate into your recipe.
The Melting Mystery: Laughing Cow Cheese Edition
You may want to see also
Frequently asked questions
To melt brie cheese in the microwave without it becoming too runny, start by cutting the brie into small, even pieces. Place the pieces in a microwave-safe bowl and cover with a microwave-safe lid or plastic wrap, leaving a small vent for steam to escape. Microwave on high for 15-20 seconds, then check and stir. If needed, microwave in additional 5-second intervals until the cheese is melted to your desired consistency.
Melted brie cheese can be used in a variety of delicious ways. Some popular options include:
- Dipping sauce for crackers, breadsticks, or vegetables
- Topping for baked potatoes, grilled meats, or roasted vegetables
- Filling for sandwiches, wraps, or pastries
- Addition to pasta dishes, risottos, or casseroles
- Spread for toast or bagels
Yes, you can melt brie cheese in the microwave with other ingredients to create a flavorful sauce or dip. Some popular combinations include:
- Brie and honey: Mix 1 tablespoon of honey with the melted brie for a sweet and savory dip.
- Brie and garlic: Mince 1-2 cloves of garlic and mix with the melted brie for a pungent and delicious sauce.
- Brie and herbs: Add 1-2 tablespoons of chopped fresh herbs, such as parsley or thyme, to the melted brie for a fragrant and tasty topping.
To store leftover melted brie cheese, let it cool completely, then transfer it to an airtight container. Refrigerate for up to 3 days. When ready to use, reheat the cheese in the microwave or on the stovetop, stirring frequently to ensure even heating. Note that the texture of the cheese may change slightly upon reheating, but it will still be delicious.